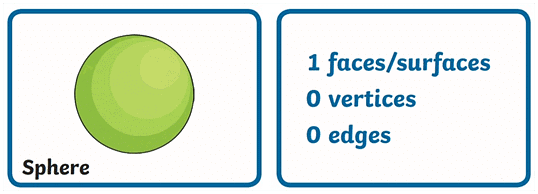
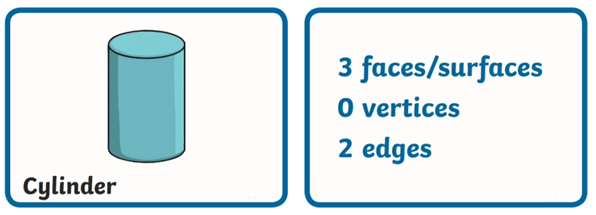
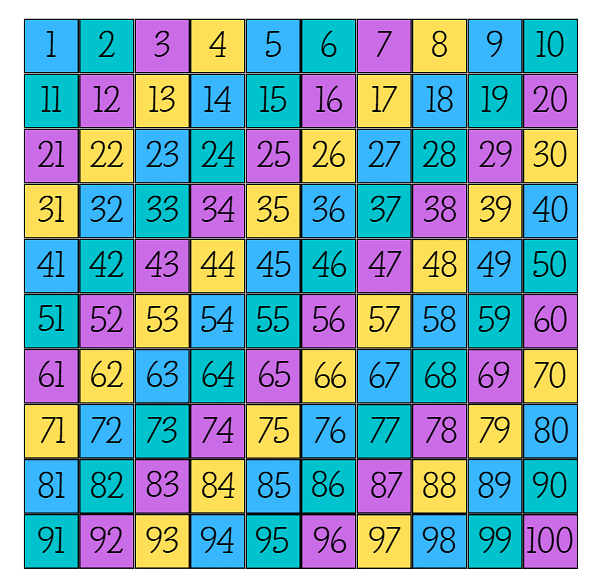
Chapter Notes: Fun with Numbers
What are Numbers?
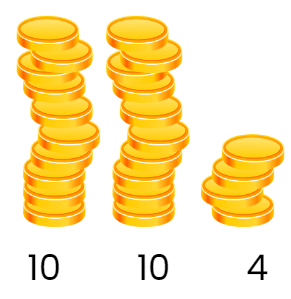
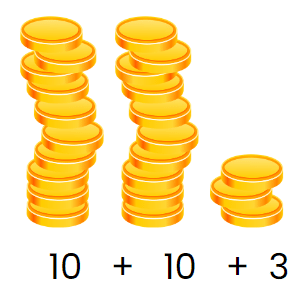
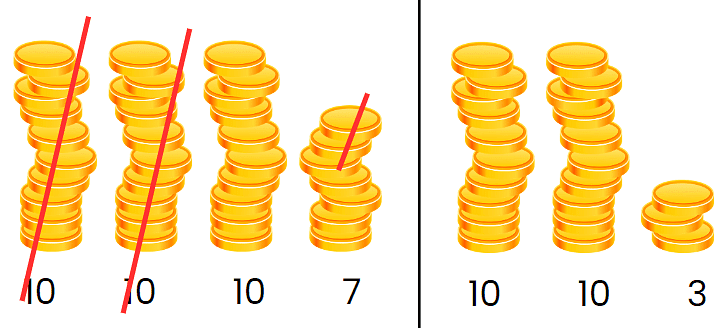
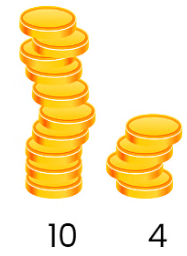
A number is a value we use for counting and calculating. Numbers can be shown in different ways: as words (one, two, three) or as figures (1, 2, 3). We can also group numbers by how many digits they have.
- Single-digit numbers have only one digit, for example 1, 2, 3, 4.
- Two-digit numbers have two digits, for example 10, 25, 99.
- Three-digit numbers have three digits, for example 100, 345, 897.
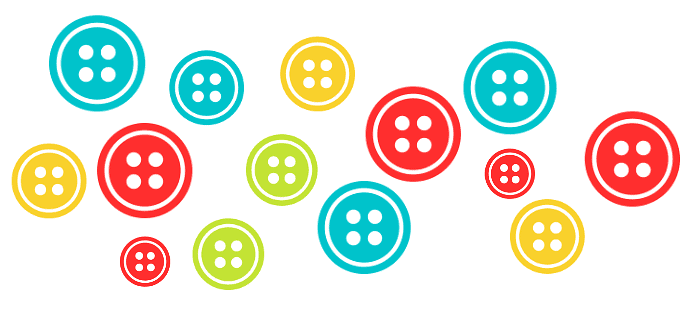
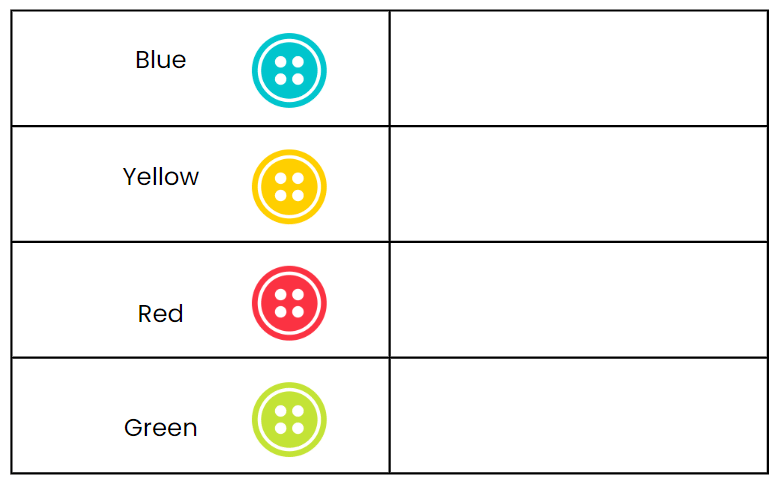
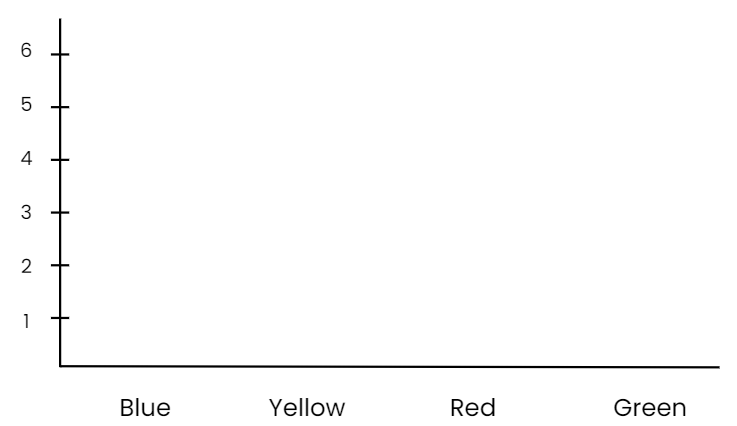
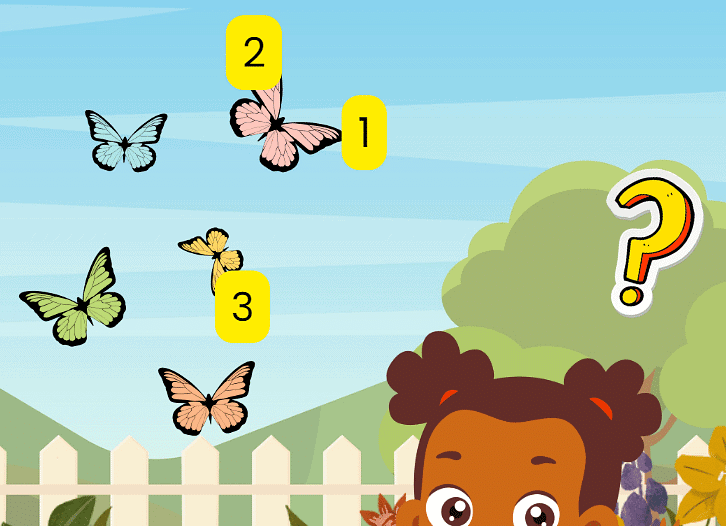
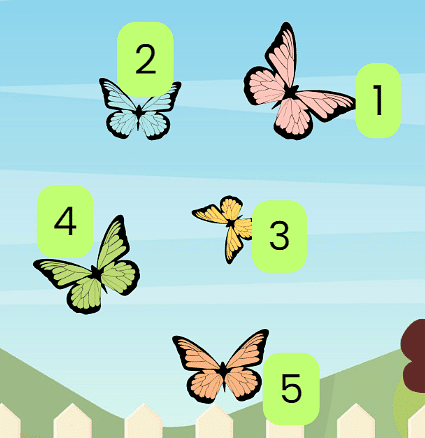
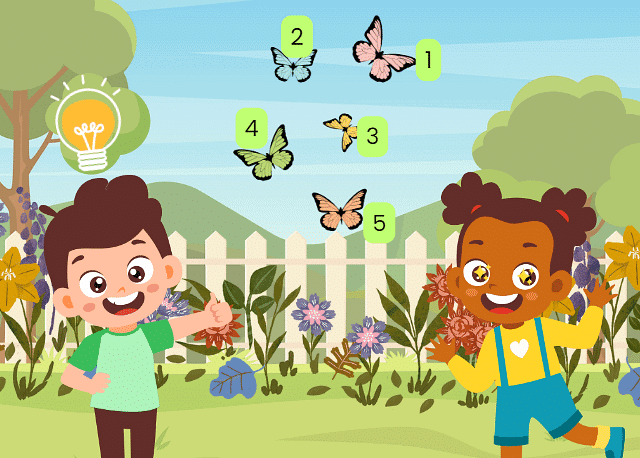
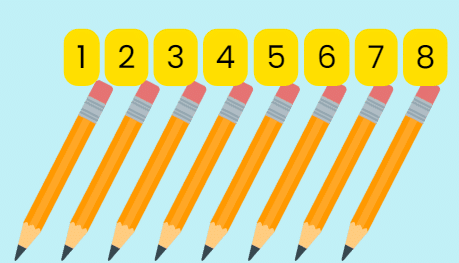
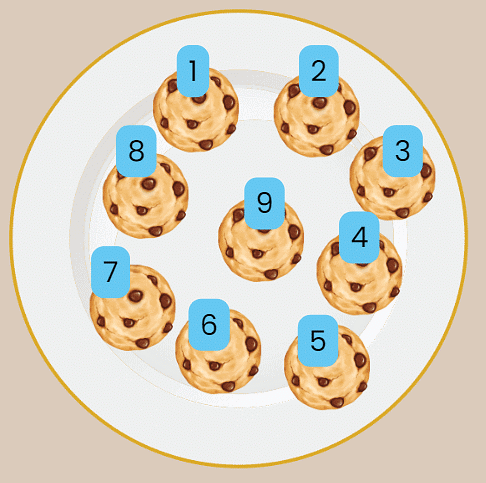
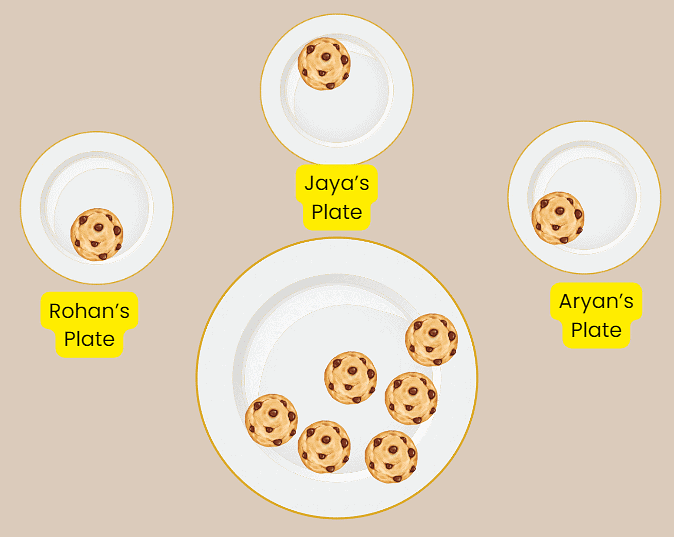
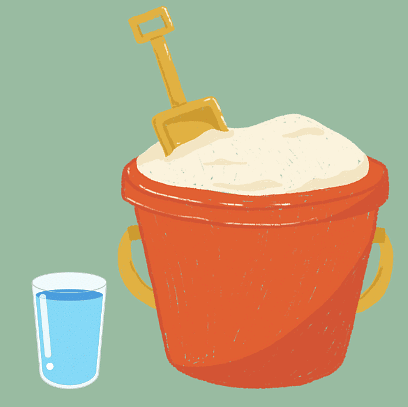
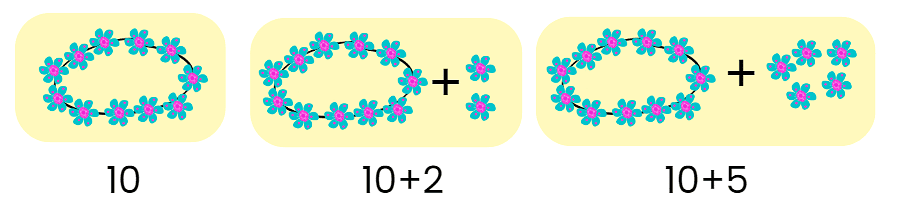
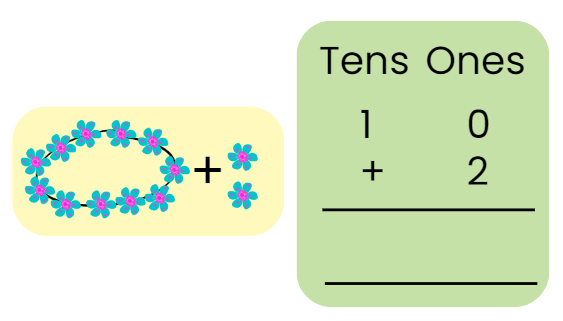
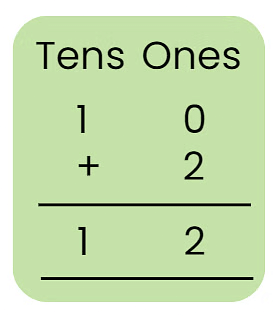
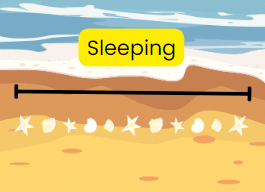
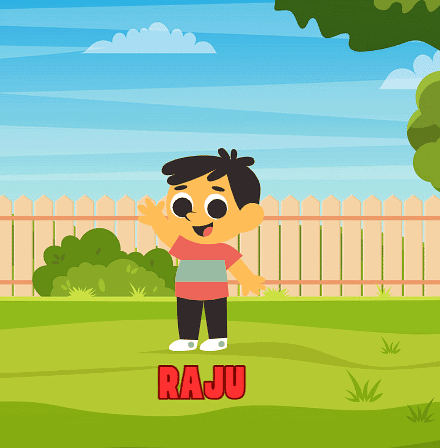
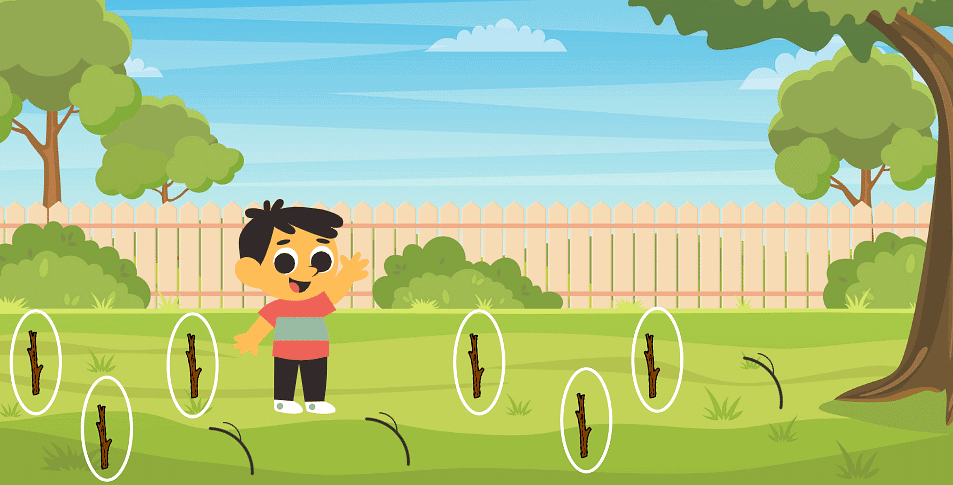
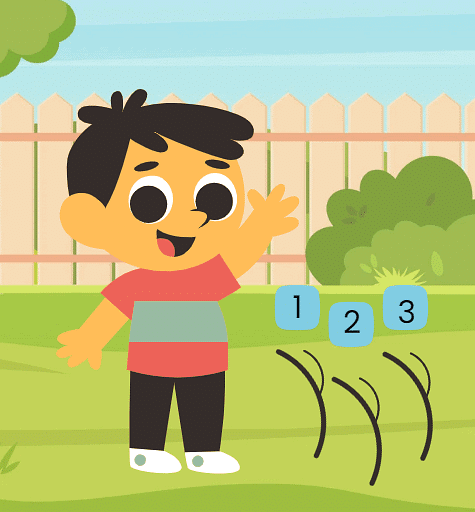
Now, students, can you count how many flowers there are?
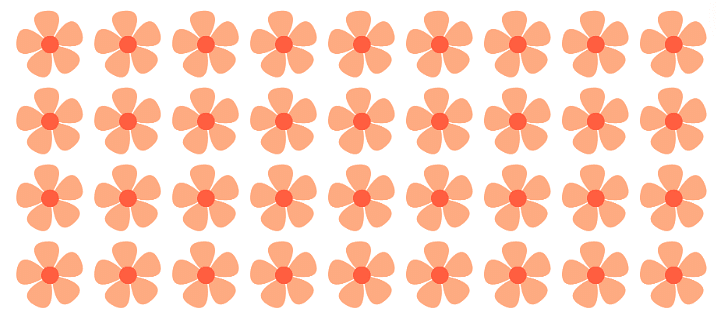
By counting these, we can see that there are a total 36 flowers.
Step Counting
Let us now read an interesting story!.
Once upon a time, there was a little kangaroo named Skip who loved counting. Regular counting was slow for Skip, so he invented step counting.
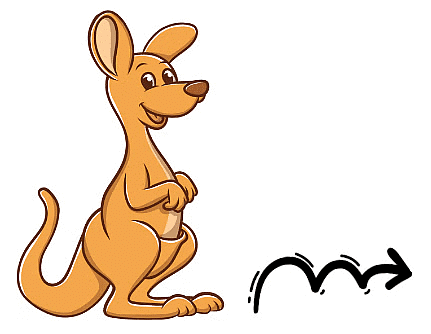
Instead of going one by one, he jumped ahead or backwards by a fixed number each time. His friends liked it and soon everyone in the jungle was step counting, making counting fun and fast!

What is Step Counting?
- Step counting means counting numbers by adding the same amount each time. For example, if you add 2 each time, you count 0, 2, 4, 6, 8, …
- Backward skip counting is counting in reverse. Instead of going forward, you start from a larger number and subtract a certain amount each time to reach the next number. It’s just like walking backwards but with numbers. For example, counting backwards by 3 from 10 gives 10, 7, 4, 1.
- Step counting helps you see number patterns and makes counting faster and more fun.
Forward Step Counting
In forward step counting we start at a number and keep adding the same amount to get the next number.
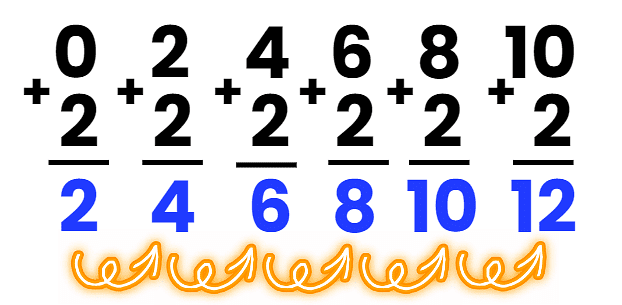
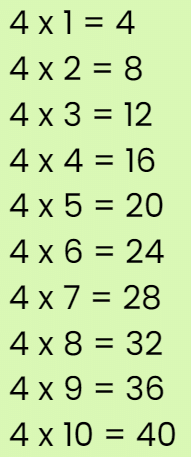
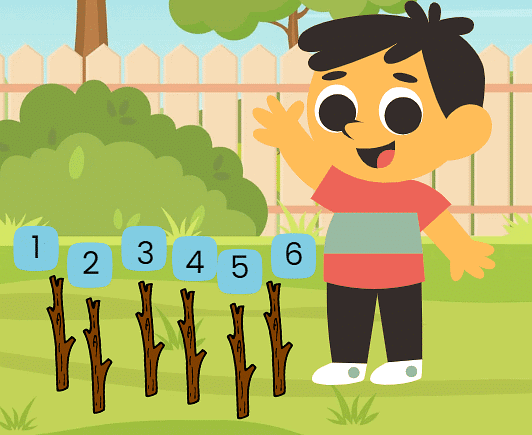
Skip count by 2
- Start at 0 and add 2 each time.
- 0 + 2 = 2
- 2 + 2 = 4
- 4 + 2 = 6
- 6 + 2 = 8
- Continue this process: 10, 12 and so on until 12 or further.

- You can skip count starting at any number. For example, skip count by 2 starting at 5 gives:
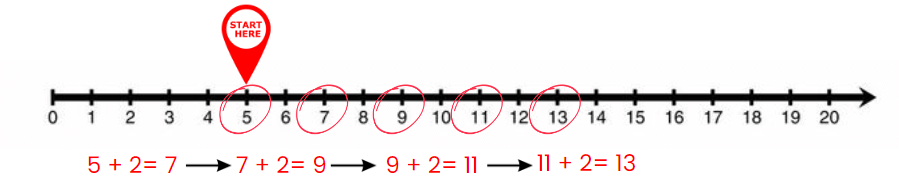
- 5, 7, 9, 11, 13 …
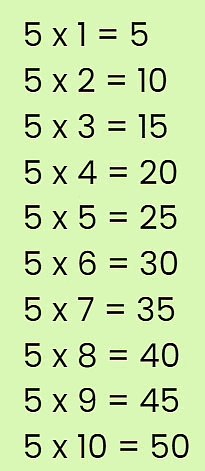
Skip count by 5
- In skip counting by 5, we add 5 each time and move forward.
- If Skip the kangaroo starts from 5 and skips by 5, the numbers he reaches are:
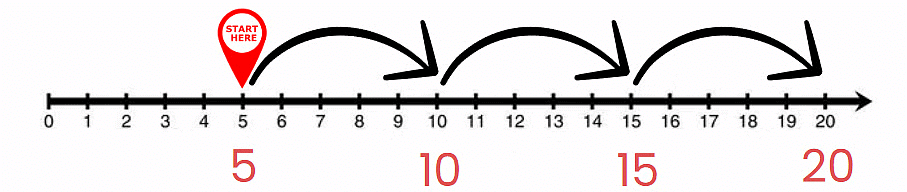
- 5 + 5 = 10
- 10 + 5 = 15
- 15 + 5 = 20
- So the series is 5, 10, 15, 20, …
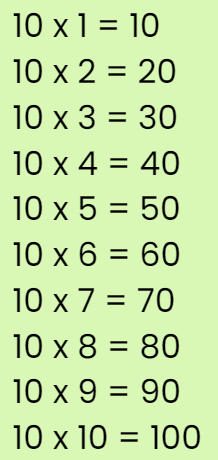
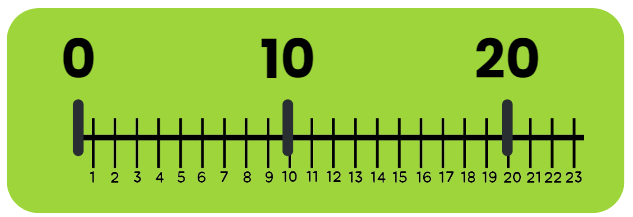
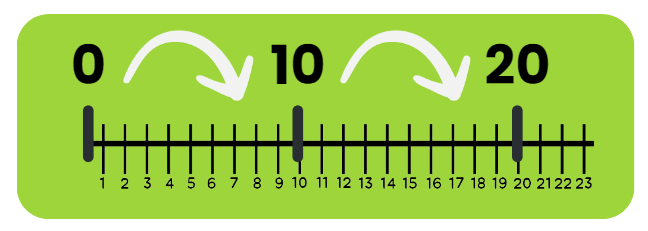
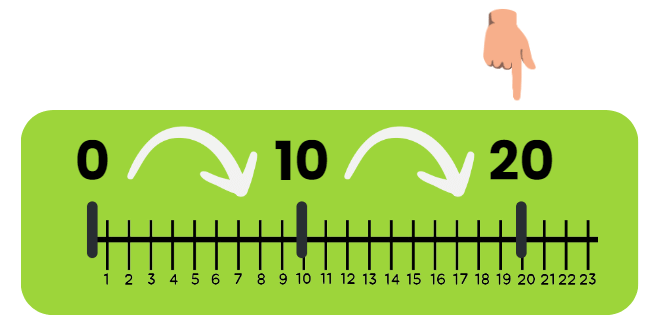
Skip count by 10
- Look at the picture of the kangaroo jumping. Complete the pattern by finding how much it jumps each time.
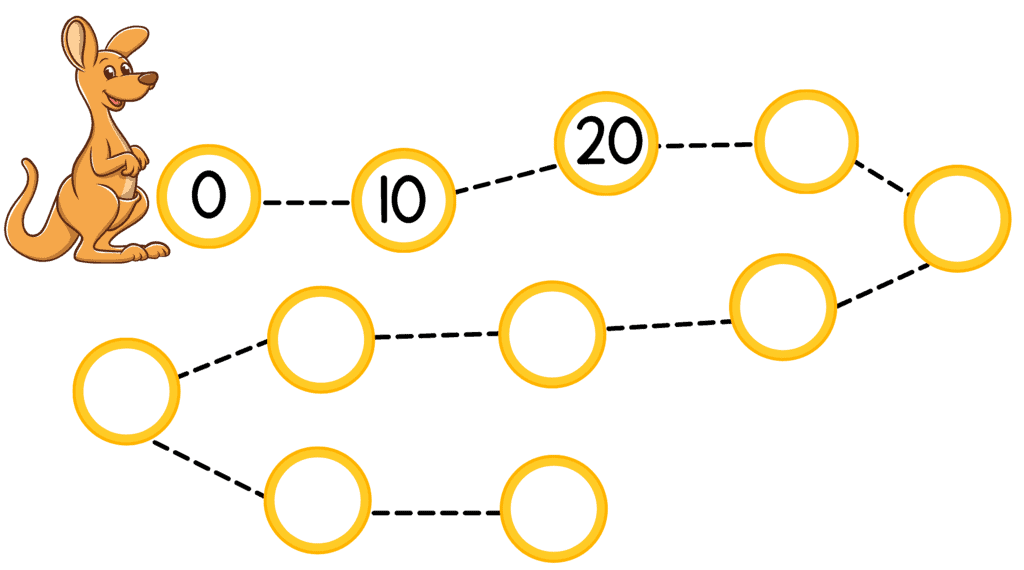
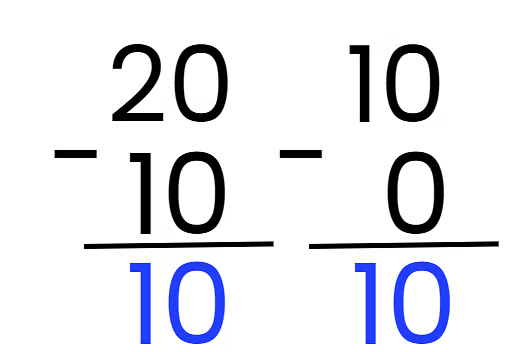
- We can see that the kangaroo first jumps from 0 to 10, then from 10 to 20.
- We can use subtraction to find the jump size: 20 – 10 = 10.
- Also 10 – 0 = 10, so the difference is 10.
- Thus, to continue the series we add 10 each time.
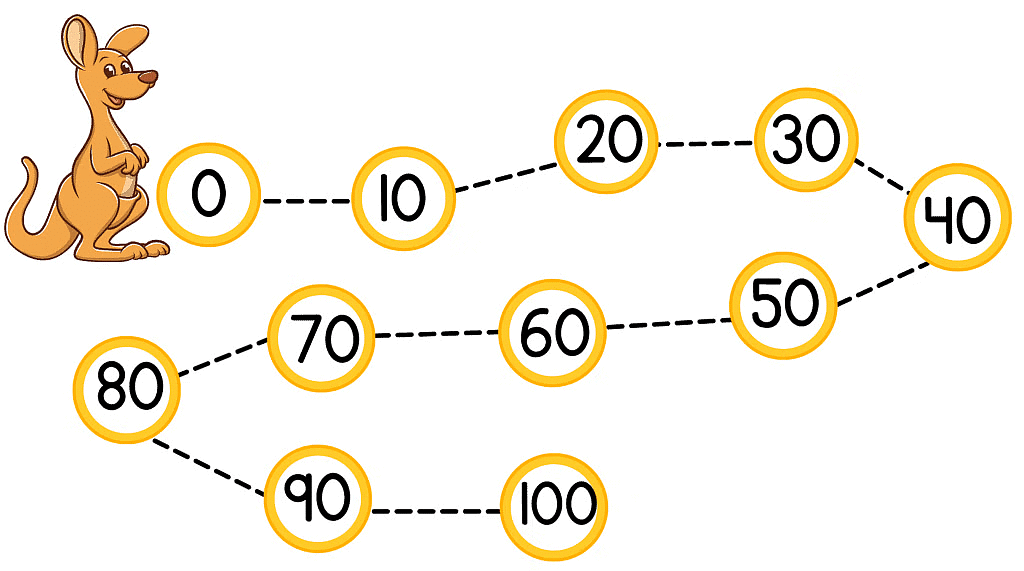
- The complete series is: 0, 10, 20, 30, 40, 50, 60, 70, 80, 90, 100.
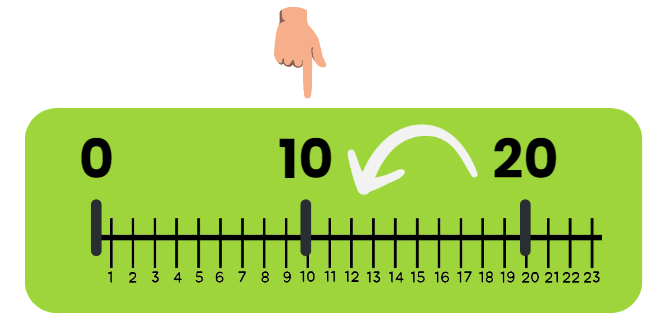
Backward Skip Counting
- What we have learned so far is called forward skip counting, which implies we are counting in the forward direction and adding a certain number to each previous number to obtain the next number in the series.
- Now, we will discuss backward skip counting.
- Backwards skip counting is a way of counting numbers in reverse order by skipping a certain amount each time. Instead of starting from a lower number and counting up, you start from a higher number and count down. For example, if you’re skip counting backward by 3s from 10, it would go like this: 10, 7, 4, 1.
Backwards skip count by 3
- Start with a number and subtract 3 each time.
- Starting from 100:
100 – 3 = 97
97 – 3 = 94
94 – 3 = 91
91 – 3 = 88
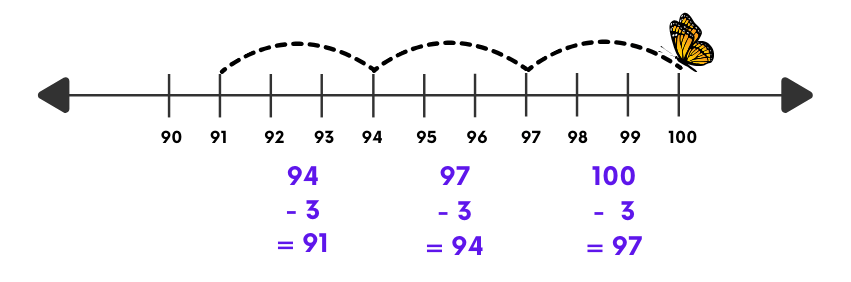
- The series is: 100, 97, 94, 91, 88, … These numbers are in descending order.
Backwards skip count by 20
- Let’s imagine we’re on a backwards adventure, counting by 20s. Instead of walking forward, we’re taking big jumps backwards.
- Start at 100 and subtract 20 each time:
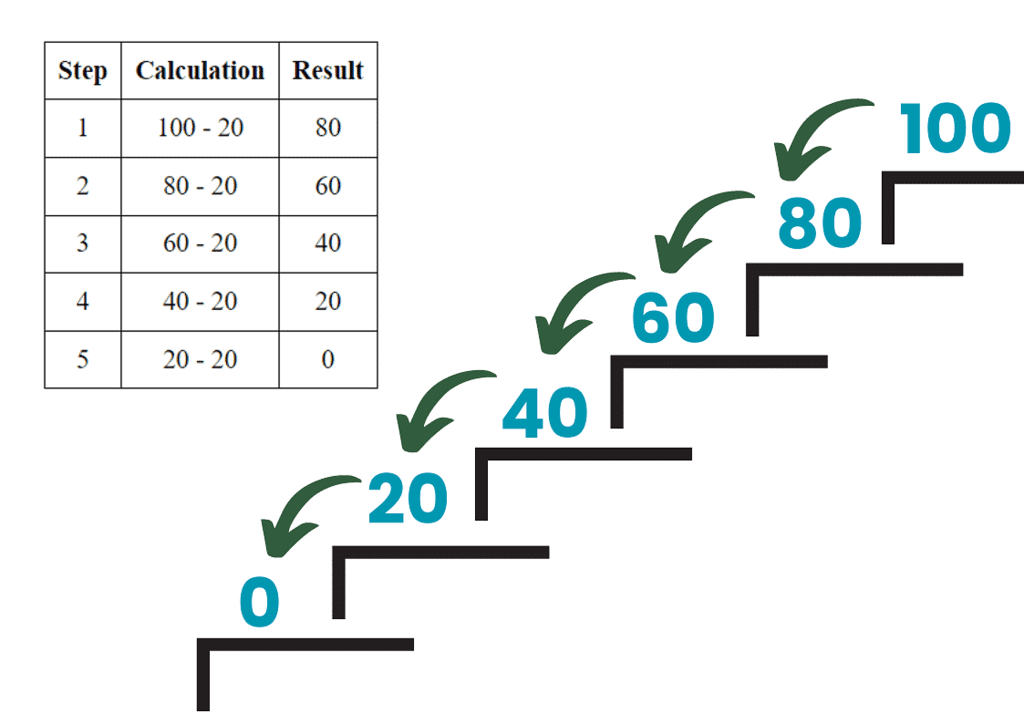
100 (start)
80 (100 – 20) – we took one step back, like a giant leap!
60 (80 – 20) – another big step backward
40 (60 – 20) – we’re really moving now!
20 (40 – 20) – almost there!
0 (20 – 20) – and we’ve reached the end of our backward journey!
Guess My Place
- Now, let us play a game in which we guess where the ants are sitting on a number line.
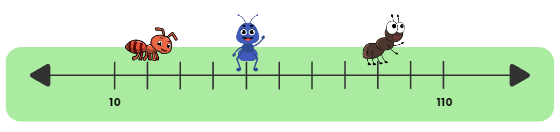
- Look at the number line, and answer the following questions:
(a) Which number is the red ant sitting on?
(b) Which number is the blue ant sitting on?
(c) Which number is Brown Ant sitting on?
- First fill the number line from 10 to 110 with equal gaps of 10: 10, 20, 30, 40, 50, 60, 70, 80, 90, 100, 110.

- Answers:
(a) Red ant is sitting at number 20.
(b) Blue ant is sitting at 50.
(c) Brown ant is sitting on number 90.
Exploring Patterns
Q: Look at the number chart and write down the answers.
__9___ comes just before 10
__19___ comes just before 20
__29___ comes just before 30
__39___ comes just before 40
Q: What is the pattern here?
Ans: Let us subtract to see the difference.
19 – 9 = 10
29 – 19 = 10
39 – 29 = 10
We can clearly see that the difference is 10.
The pattern continues: 9, 19, 29, 39, 49, 59, …
Q: Now, look at the numbers coloured purple in the number chart. Write them.
7, 16, 25, ____, ____, ____, ____, ____, ____, ____
Ans: 7, 16, 25, 34, 43, 52, 61.
Q: What is the pattern?
Ans: The difference is 9. Nine has been added to each number.
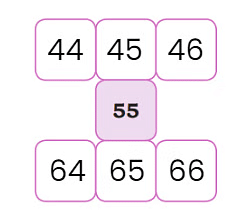
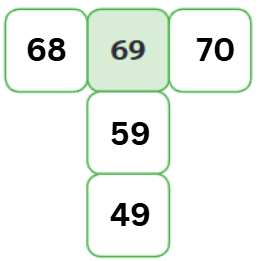
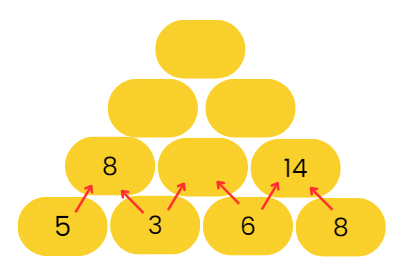
Look at this fun number window
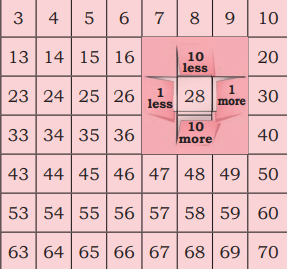
Using the number window, we can find numbers above, below, left and right of a given number by adding or subtracting 1 or 10.
Fill in the blocks given below:
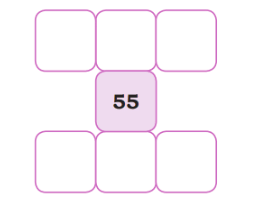
Observe how blocks are placed and extend the pattern further.
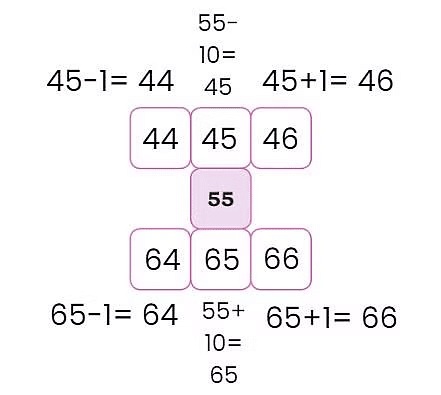
To find the block above 55, subtract 10: 55 – 10 = 45.
To find the block below 55, add 10: 55 + 10 = 65.
Now, moving on to the above row, we have found the middle block, which is 45. To find out the block on its left, we need to subtract 1 from it.
45-1 = 44
To find out the number on its right, we need to add 1 to 45 which gives us 46.
Similarly, we find out the numbers in the last row.
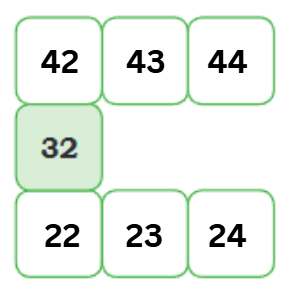
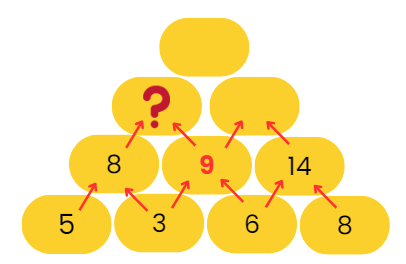
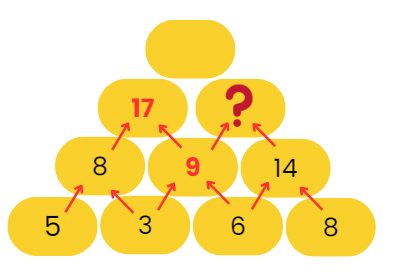
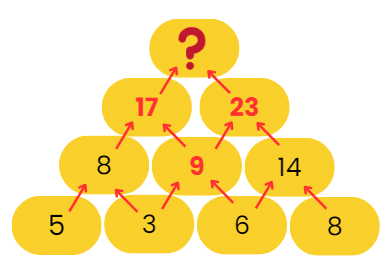
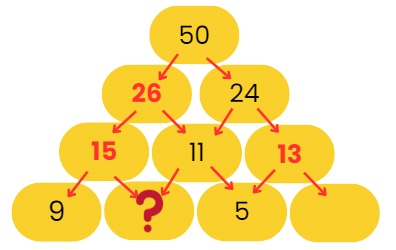
Let’s look at some more examples of number grids:
1.
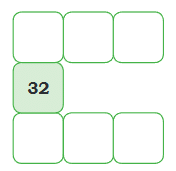
Using the same logic, add numbers to this grid:
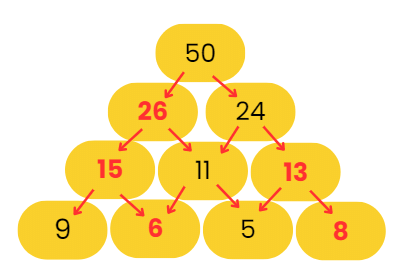
2.
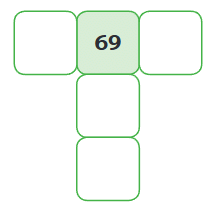
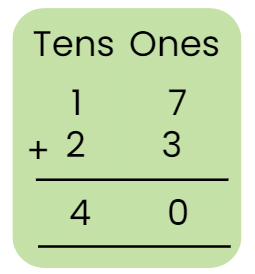
Let’s fill up this magic grid:
Hope you enjoyed playing with numbers and exploring different games. Keep practising and having fun!


 Spring


 Winter

 Day & Night
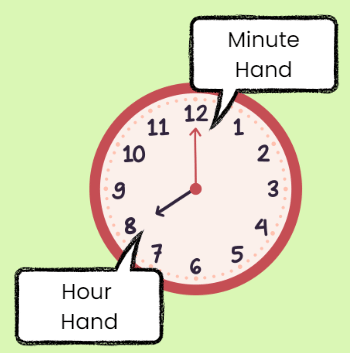
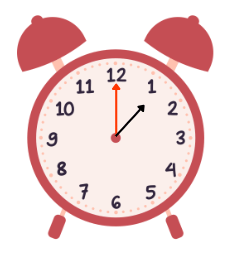 1 o’clock
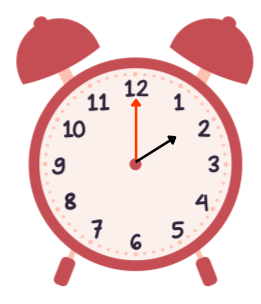 2 o’clock


 Left & Right
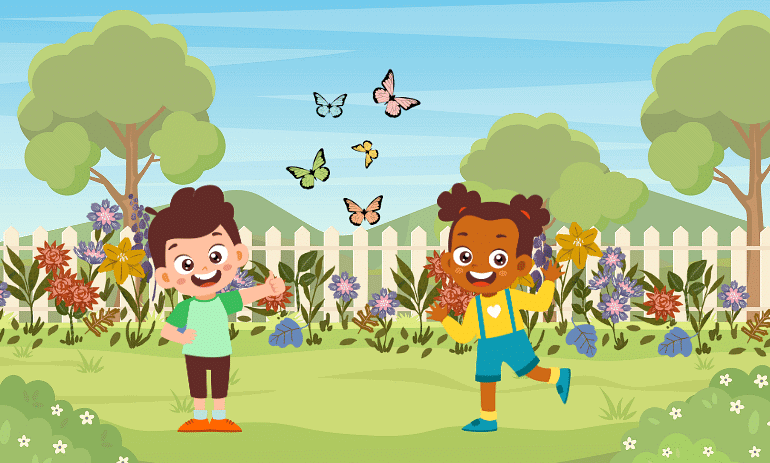


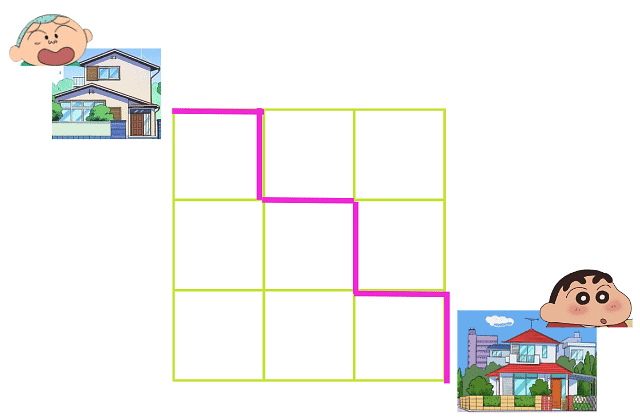
 Shinchan & Masao
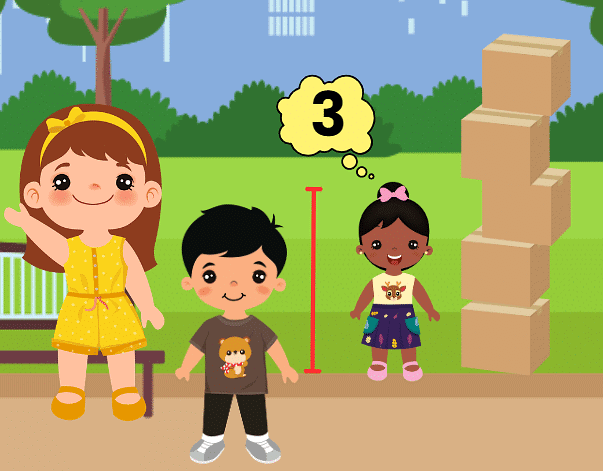 Disha is 3 boxes tall


 There is only 1 Curved line.
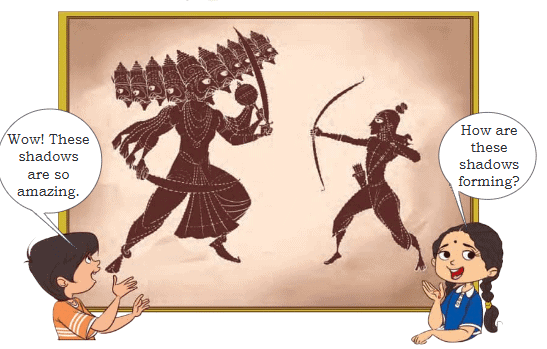
 Circle Shadow made by Ball
 Triangle Shadow made by Birthday cap